Sunday, December 8, 2013

iPads and Projects and Apps, OH MY!

Some of my amazing colleagues from
Norfolk Academy during the conference.
L to R: Scott Fowler, ElizabethGlassman,
Maria Moore, Susie Coker and Ed Patterson
I had the fortunate opportunity to attend and present at the Ed Tech Teacher iPad Summit in Boston November 12-15, 2013.  For any educator who is thinking about using iPads, just starting to incorporate iPads or is a master iPad user in their classroom, this is the conference for you. This was my second time to attend the conference, and once again my brain was filled with so much amazing information I am now just able to put it in writing. Just over a year ago, I was introduced to some of the most influential educators I have encountered. The team of Beth Holland, Shawn McCusker and Greg Kulowiec have emerged as the long distance tripod to balancing the world of the iPad. They are my go-to people with questions and ideas. Their influence brought me from being a novice iPad user to now being a knowledgeable resource in my school.  They are the reason I blog, tweet and take risks.My colleague, Ed Patterson (@espatterson), and I presented at the conference about using iPads in the middle school science classroom and our experience over the past year.  You will find the resources to our session at the following links.

iPads and Projects and Apps, OH MY! Prezi
Live Binder Resources for iPads and Projects and Apps, OH MY!

As with any work in progress, I wish I had more time to share the amazing work of my students and colleagues during the quick 50 minute session. What a marvelous world of inquiry I am a part of.

I am currently working on a project with my students that I created while I was at the conference. We are doing an "appsmash" with Explain Everything, ThingLink and Book Creator to make a semester review book for all of my students to use for their exam review.  Click here to access the project information.  The final product will be shared through Google Drive and saved to each student's Evernote portfolio. Stay tuned for the final product! I will post it after their deadline next week.

To learn more ways in which I am using technology in my classroom, follow me on Twitter @eglassman757.


Tuesday, October 22, 2013

All You Have to Give is Twenty Percent

This is my 10th blog post and we are in the 10th month of the year, so I figured I had to go with something to do with 10 in this blog post.  So, what is better than doing a multiple of 10 and go to 20? Either I have your curiosity piqued or you are not a fan of my middle school logic and are ready to move on to another activity for the day.

You may or may not be familiar with Daniel Pink who is the best selling author of five books dealing with changing the world of doing work.  As a professional development opportunity a couple of summers ago, I read Drive by Pink.  In his book, Pink describes the effectiveness of 
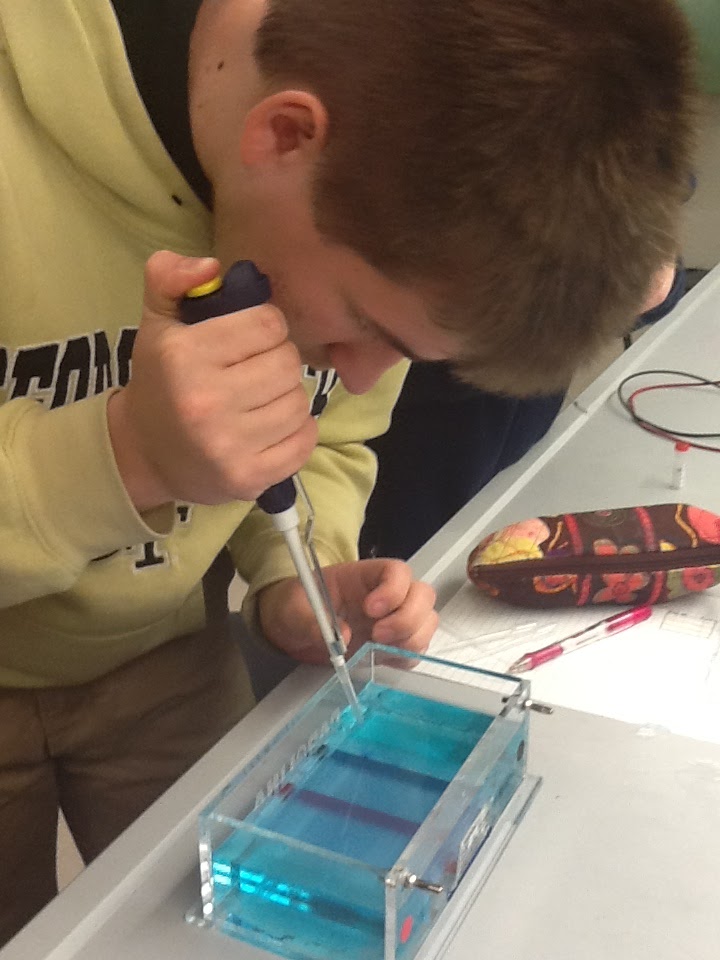
Google's twenty percent time in which employees are allotted twenty percent of their time to work on a project of their own interest. After getting excited about the idea of giving students time to work on an open-ended project that they design, my colleague, Scott Fowler, and I decided to take this concept and use it in our classrooms to study the scientific method. We designed a project focused on creating a water filtration device design to fit into a two-liter bottle. This idea came from Scott's experience traveling with the Norfolk Academy Global Health Fellows to Haiti in the summer of 2012 when they met with local children and families to discuss and promote the importance of using potable water for hygiene and cooking. We watched our students wrestle with everything from affordability of materials to filtering microbes that the finest of filters can't detect. Bottom line, did they create the next water device? No. However, did we study the scientific method in a way to open their eyes to real world problems and issues? Absolutely.

This year we decided to keep the valuable project time and devote every Friday of first term to another twenty percent time project. Our charge to students was to design a green roof design for our geographic area, focusing on a specific variable of each group's choosing (insulation, run-off, drainage, etc).


The following list of ideas and suggestions chronicles how I worked with my students through this year's project.

1. Introduce with something attention grabbing. We used the NBC video clip about green roofs, Green Roof Saves Chicago. This clip may seem little outdated, but it features one of our own Academy families who served as a resource for our students. You can follow their website at the link, Our Green House. There is also a more recent clip from WVEC 13.

2. Provide parameters to the project, but not rules. You can find my project guidelines by clicking here.

3. Be clear on your expectations for grading. You can find my project rubric by clicking here .

4. Have a pre-determined calendar of dates with intermittent deadlines. I included that with the project guidelines.

5. Keep the twenty percent time "sacred" from everything else. Show your students that you value this time every week.

6. Because we use shared iPads, we had to make sure students could access information out of class.  One of the biggest "mistakes" we learned together was the idea to rely on Evernote as a storage place for group information. We are using Evernote for their lab portfolios, but they are single user accounts. There is not way to do collaborative sharing in those documents. Next year, I will require that all information is stored as a Google Doc for the groups to share. 
Ideas were fantastic, at times frustration was high, but overall, we had similar results to last year ... students were learning, doing research, building prototypes, submitting reports and then told to make things better. This was a true lesson in being committed to a problem and dealing with having to modify and rebuild when a first attempt didn't necessarily come through. This project definitely held our students to the four core tenants of our middle school experience: respect, commitment, grit and toughness.  

To learn more ways in which I am using technology in my classroom, follow me on Twitter @eglassman757.

Friday, September 13, 2013

APPsolutely SMASHing!

It amazes me that what I think I am going to blog about at the beginning of the week is totally different than what ends up being posted! I finally experienced the magic of AppSmashing! What is that you might ask? This is when you take combinations of apps to end up with a final product that couldn't be created with one application. For my students, we used Explain Everything, Nova Elements and Evernote to create their first digital portfolio entries. This week started off with an activity that I have done for years. We are in the midst of reviewing basic chemistry to prepare for organic compound mastery in the next couple of weeks. To bring some excitement to the practice of making covalent bond models, we use gummy bears for atoms and toothpicks for bonds. This is a fun way to keep kids interested, and sneak a sweet treat in on the side! To combine the technology with the traditional, I decided that this assignment would be the first activity that my students would complete and turn in using their digital biology portfolio. Before doing the lab, I had each student set up an account on Evernote using the iPad app. As with every class account we have, I make sure my students keep a log of usernames and passwords.
What I like about Evernote is that they can access their account from the app on the shared iPad. We do not need them to make any iPad account adjustments within class.  As long as they log out of the app at the end of the bell, it is ready for the next student to use.  I also like Evernote because students can access their work from any internet source at home or at school.  Once the accounts were established, we got started building molecules.  Each student had a list of required molecules to build. I encouraged students to work together as they figured out configurations and ratios. As students completed models they took pictures of the models directly into their portfolio documents. 

After completing the lab, students brought their lab entries to me to review pictures and models. As we noticed that some needed revisions, students asked if they could do something rather than rebuilding with the physical gummy bears toothpicks. This is where the magic really began! I decided to introduce kids to Explain Everything to edit and annotate pictures.  This was the best decision of the entire activity.  I worked with small groups to show them how to work between the apps and insert the corrected photos/diagrams back into their final paper.  What resulted was priceless. Not only did I feel like I could really understand my students' thought processes as we made corrections, but I saw them helping one another to find understanding.  They helped one another learn the new apps and learn the concepts.  What started out as an activity that I thought was predictable and familiar, turned into an experience where I was taken to new experiences in teaching and learning for both my students and me.  
Here are a few suggestions I have to offer when you decide to do adapt a traditional lab to the technology age of science. 

1. When deciding to go digital for a lab book/portfolio, choose a program that works for you.There are so many out there that work well. As with everything else iPad, there are hundreds of ways to answer a question and all are correct!

2. Take the time to walk your students through setting up their accounts and make showing their parents a homework assignment. You will not regret slowing your pace down to make sure everyone is comfortable.

3. Use an activity with which you are very familiar for your first digital assignment. You can anticipate where students will have questions with the concepts to give you more flexibility to address technology issues. 

4. Allow time for mistakes and "do-overs" with the activity you choose.

5. Expect surprises! This is the best part of all.

To learn more ways in which I am using technology in my classroom, follow me on Twitter @eglassman757. 

Wednesday, September 4, 2013

It's Great to Begin Again!

It is hard to believe that I have not written a blog since May, but as the old adage goes, "time flies!" and yes it has! After having the summer to reflect on my first year of having shared iPads in my classroom, I am very excited to begin again. Now that I have finished week one of the new year with my BioBulldogs, I feel like I am at at good point to reflect on what I did differently to start this school year than last year.

I am now officially in my second year of having iPads in my classroom. I think what surprised my students the most is that we didn't even talk about iPads on day one. My focus was on honor, community, and understanding of the individuals in our classroom. In fact, we didn't even use the iPads on day two. If you are thinking about adding iPads to your classroom, just starting out with iPads this year, or you have experience under your belt with iPads, maybe you can find my take-a-ways of value.

1. Introduce your content, your expectations and yourself before the iPad.  If your school is like mine, the kids want to know you first and the technology second. I am blessed to teach in a community where the relationships between students and teachers trumps all else. The moral fabric of our community rests in honor and trust.

2. Make sure you have clear iPad etiquette expectations so that technology doesn't interfere with learning. In my classroom, all students are assigned a numbered iPad for the year.  When this number is given, students write the number on a log that they will use for all of their username and password information for the year. Students quickly get used to learning phrases like "screens off"  when I need to make sure they are tuned in to what we are doing. Little things such as not changing backgrounds, screen savers and moving apps are important points to make with shared iPads. It may seem very trivial, but you do not want students becoming frustrated because they cannot access their i-text or find the project app.


3. Assume that the first time you introduce iPads to your class that all students have zero experience with them.  This way, you are starting everyone from the same point. They will quickly show each other new features and ways to use the iPad. Even the most experienced users don't know everything. Many students are going from using the iPad for entertainment and consumption to using it for a totally new purpose in school.  Using a simple checklist of skills will give you a quick gauge on ability levels.


4. Allow time for discovery.  I have already noticed a stronger comfort level in my students this year since I have given them two full days of class to explore. The first day they were given specific tasks to do. The second day was devoted to working with the i-text version of our book, Biology by Miller and Levine. My students are using e-texts at home and i-texts in class. I want to give them the opportunity to get used to using the book in different platforms to write their notes. We also explored using one of my favorite apps, Nova Elements. Students can build atoms, much like a game, to show understanding of the periodic table and properties of matter.


Overall, the year has started off smoothly thanks to patient students who have a willingness to keep a solid balance between tradition and technology. Stay tuned for next week when we officially launch our class Twitter account and announce our first term project!

To learn more ways in which I am using technology in my classroom, follow me on Twitter @eglassman757.


Friday, May 17, 2013

This Little Piggy...Dissection with a Twist of Technology and Splash of Tradition

One portion of a biology curriculum that always faces questions is dissection. There are feelings of extreme support and extreme disapproval and everything in between.  Fortunately, I teach at an institution that fully embraces the exposure of students to dissection.  My syllabus includes a week long dissection study of the fetal pig. We use this organism because it gives students the best small size model of what their bodies look like on the inside. The fact that they can actually hold a four chambered heart is fascinating to them. Seeing and feeling all that we talk about is so much better than just accepting that these tissues and structures exist.  Knowing that not all of my students share the same enthusiasm for this type of lab, I do make sure I have parameters and options for all levels of interest. 

1. Knowing the anatomy and physiology is mandatory for the course; touching the pig is not. This is a real worry for some students that needs to be put to rest sooner than later. Virtual dissection is always an option for my students.


 2. Dividing kids into groups based on comfort level makes for smoother lab time. I have students fill out a questionnaire based on 1-3 scale; 1 being ready to "fly solo" and 3 being "I need oxygen to get through it" option. Honestly though by week's end, they are almost all at the "I want to do this again" level.

3. Providing virtual dissection options helps for at home review.  My favorite options for out of class study tools are the Pig Dissection App from Kids' Science  and the Whitman College VPD and Biology Corner Pig Review websites.

4. Requiring a comprehensive assessment gives a defined goal. I set up a practical test where kids rotate through stations to identify structures, functions and systems of selected organs. This gives them the feel of a "gross anatomy" exam and encourages groups to look at other specimens besides the one they are using for their work.

5. Having a relaxed atmosphere with fresh air is a definite bonus!  This may not apply to everyone, but it works for us (disclaimer: be ready for extra lab attire if the weather isn't ideal). We set up a tented area outside for dissections that allows kids to step away if needed, but also provides a great opportunity for all levels of science to be exposed to different organisms. Our life science students were studying worms, grasshoppers, squid, crayfish and frogs, while our advanced biology students were examining cats, sharks and rats, and our biology students were in the mix with fetal pigs.  It is always enjoyable to see our 7th, 9th, 11th and 12th graders all together in one place learning science!
 
 
To learn more ways in which I am using technology in my classroom, follow me on Twitter @eglassman757.


Friday, May 10, 2013

Putting My Students in the Driver's Seat of Assessment

One of my goals as a teacher is to make sure my students know that they are in the driver's seat during the year. I try to be the teacher who rides in the passenger seat to help provide directions, offer input, and of course hit the brakes if they are ever steering out of control. I want them to realize that their achievements are earned and not just given for jumping through hoops.

A few weeks ago I lived up to that goal, more than I have in the past. I gave up the control of a traditional assessment and left the design of a project to my students. Over the course of two days, they came up with the parameters, requirements, and content of a project covering the respiratory and circulatory systems.  It all started when a group of students approached me about doing a project to help them study for exams. They weren't looking for bonus points, just an opportunity to use the iPads to explore ways to help them study. This then manifested itself into a project for the current chapter rather than a paper and pencil test. I must say, I was little apprehensive at first. I didn't want my students to think that doing a project would be an "easy A" or simple task.  I have never completely replaced a test with a project. However, I figured I would give it a try. So I put on my seat belt and off we went!

Class discussion lead to brainstorm lead to replacing chapter test with iPad project.

Here are five suggestions if you ever decide to take the same risk....

1. Set guidelines, but not rules. The more specific the details are, the more likely your students will have projects that resemble one another. Had I said that everyone needed to use the same app or work on the same topic, the results would have been much different.

2. Give time in class to work. Since I have a shared iPad program, students can only work on filiming the projects at school. I have been very flexble to having a "working deadline" that was not set in stone. Some kids needed extensions for athletic dismissals, coordinated study hall time, or to add more to the project. I had kids asking for more time because they wanted to make their projects better. 


In the project featured above, extra time was given to make an iPad holder out of ring stands


3. Regardless of the project style, capture it on the iPad. I loved the fact that boys were dancing, girls were sculpting, and kids who are usually quiet in class were proud to show what they learned.


4. Provide a solid rubric for grading. Shawn McCusker's blog post, "Blow the Top Off Your Rubric" was a fantastic starting point for me. My favorite suggestion that he gave was to allow for failure and correction. When my students brought their projects to me, I often said, "This is good, but how can you make it great?"

5. Be patient, anticipate roadblocks and be amazed.


Bottom line, the projects were awesome. I am still amazed at the results. I have learned that whatever bar I set for my students, they will measure it and jump higher.....every time.

To learn more ways in which I am using technology in my classroom, follow me on Twitter @eglassman757.

Tuesday, April 16, 2013

Knee Deep in Human Anatomy/Physiology

Regardless of the topic or conversation in my classroom, tradition always fuses with technology to get the job done.  My students are "knee deep" (pardon the pun) in studying the anatomy/physiology of the human body.

I remind my students that they must read, write notes, and study diagrams they color. Our brains rely on these traditional skills that need to used daily. One cannot replace the act of reading with anything else. Whether using a traditional textbook, e-text, or i-book for my course, students need to read the content. All that being said, I am covering the human body systems (we are currently focused on skeletal, muscular and integumentary systems) with an infused approach by exploring using the following items.

1. The Human Body Facts 1000 app is great for engaging students with random bits of knowledge about the human body. For example, did you know that if you put all of your blood vessels end to end, they would reach approximately 60,000 miles in length? This app could lend itself to some great dinner conversations, or problem solving activities.


2. In conjunction with using the Rover app, since iPads are not flash based, The Interactive Body by BBC Science is fantastic. This website gives students visual study guides, as well as interactive quizzes.

3. The 3D Human Anatomy Atlas website by Visible Body is a solid resource for giving students a rotatable view of almost every body structure known. This is pretty advanced, but offers visuals and quizzes and is much easier to use in study hall than a 6 foot model!

4. Using Quizlet is a great way to review organs with respective systems and functions.

5. Other apps that have proven helpful are Visual Anatomy Lite and Essential Skeleton which are both free.  I have really enjoyed Essential Skeleton for review.  It allows students to draw directly onto the diagrams to make their own practice quizzes. Anatomy 3D: Organs is worth the $3.99 cost. I look forward to using that app when the time comes for semester exam review. As a side note, be careful when looking through anatomy apps.  Many are designed for medical students and physicians.  The fact that they are extremely advanced could be frustrating for a high school biology student.


I am truly enjoing the freedom and flexibility that technology integration affords my students. Seeing them focused in groups or as individuals is fantastic.  I love the fact that I need to remind my classes that it is time to leave.  What a blessing it is that I teach a group of students who do not want to leave when the imaginary bell rings.

To learn more ways in which I am using technology in my classroom, follow me on Twitter @eglassman757.


Sunday, March 17, 2013

Grab Your Popcorn! It's Crime Lab 2013 Movie Time!

I have never enjoyed grading as much as I did while viewing the movies created by my students for our crime lab. Here are the main lessons I learned from this project to remember for next year.

1. Only allow students to use first names in projects. I will not post anything on here that has a last name. That definitely limits me on the number of videos I can show you.

2. You can never have enough bandwidth when uploading projects. Thank goodness I was on spring break the week after projects were due. I was able to focus on getting the projects uploaded to Vimeo when no one else was on our network. Even at that, I averaged 10 minutes per iPad movie.

3. Check weekly limits for free video uploading so you don't have to pay.  Because I did not want to spend money when uploading videos, I could only upload about 20 movies a week. I was lucky to have my weekly limit reset on Tuesdays to get them all done.

4. Providing an iMovie tutorial is extremely helpful to keep frustration at a minimum.  Students were at different levels of comfort with the app so I made sure I was available to help learn the quirks with them and share anything learned from other students as the days progressed. There are some fabulous YouTube tutorials out there!

5. Be patient and prepared for failure. In anything new, especially technology minded, I have learned that what I think will take 20 minutes may take an hour. However, I have learned more from those failures than anything that goes right the first time through.

6. Be ready to have your socks knocked off! I am still marveled by my students. I am one proud "school mom"!

Grab your popcorn and enjoy the shows!


To learn more ways in which I am using technology in my classroom, follow me on Twitter @eglassman757.


Monday, March 11, 2013

Please DO Ask Questions and Make Comments During the Movie!

Today I used a new twist on the old... Today'sMeetThe old is watching a movie, and the new is being allowed to have a conversation while the movie is playing!  I learned about this website back in November from Shawn McCusker (gowhereyougrow.wordpress.com) and am finally putting it to use. 


By using Today'sMeet, I am looking at the "back channel" of my classroom. What are back channels you might wonder? They are the behind the scenes conversations and notes that students use to seek clarification during classroom activities. They are secondary conversations to what is primarily happening in the classroom.  

We started the movie, Gattaca, in biology today. If you haven't seen it, the plot consists of a society in the "not so distant future" that uses genomics and biometrics to create and organize society. Students have many questions about the movie, especially on the first day. Before class, I created a Today'sMeet url for each class. It is very simple and lasts for a set amount of time. I selected ours for one week. This url is then provided to students to join the chat.
 
When my students came to class, they used their assigned iPads to log on to the network. I then explained the "Rules of Theater 416." Your rules need to be well defined. Posts cannot be erased and are seen by all who participate. 

This is what the conversation looks like on the iPad screen.
 I kept the rules clear and simple:
1.       Only have the Today'sMeet page open on your iPad. All other apps are closed.
2.    Log-in using first name.
3.       Post an original comment or question during the movie.
4.       Respond to another student’s comment or question during the movie.
5.       Any unacceptable posts will result in a zero for the assignment.

So, how did it go? Check out this screen shot for the answer.  This is just a portion of a conversation during the first 30 minutes of the movie.


This is a screen shot of a portion of the transcript from one class.
I launched this idea today hoping that it just wouldn't crash and burn. Instead, I am marveled by the genuine interest and dialogue shared by my students. I can't wait to see what I will learn from them tomorrow.

To learn more ways in which I am using technology in my classroom, follow me on Twitter @eglassman757.

Wednesday, February 27, 2013

Suspects and Crime tape and iPads, Oh My!

My students are currently finalizing their Crime Lab 2013 projects. This three week unit is what pushed me to start this blog. I was posting pictures and updates on Twitter, and actually had requests to blog about the project! So here goes!


I started doing a forensic science unit 12 years ago. It started with two suspects and four classes of students. It has now evolved into having 137 biology students divided into investigation teams (one per suspect), 42 faculty suspects and one faculty victim. My colleague, Scott Fowler, and I co-teach the unit for three weeks. It is fantastic to have flexibility in our schedules to work and collaborate as we do. It is also wonderful to have the opportunity to interact with every single 9th grade student in our school. This year's major change: an iPad is assigned to each team for the duration of the project.


The apps that have been most critical for this project are Explain Everything, Dropbox, Google Drive, and iMovie. This is also the point to recognize Ed Patterson, our Director of Academic Technology. He has been our "go to guy" for all questions iPad. He is patient with my questions, and flexible to meet and work with students. Having solid academic tech support is essential.

First, students are introduced to evidence collection by Joan Turner, City of Suffolk Education Outreach Coordinator, and chain of custody by Matthew Glassman, a Deputy Commonwealth's Attorney in Suffolk, Virginia.  Walking students through a case prior to their assignment has proven to be very helpful.


Students navigate through the project by completing a series of tasks and labs that narrow the suspect list from 42, to 10, to 4 to the top two suspects. DNA profiling reveals the guilty suspect. The highlighted activities include hair analysis, fingerprint analysis, blood spatter pattern, drug analysis, karyotype analysis, blood typing and DNA profiling. Three key points of any good evidence collector are photos, notes and sketches. As teams progress through the lab, they are able to do all of this in one organized location....the iPad.

Bottom line, iPads shouldn't ever replace collaboration, conversation, reading, writing, and data analysis. Students need to interact with each other. 

Stay tuned for the forensic teams' iMovie "Mockumentaries" that are due by Friday this week!

To learn more ways in which I am using technology in my classroom, follow me on Twitter @eglassman757

Tuesday, February 26, 2013

Jumping Off With My Water Wings Fully Inflated

     I am sitting at my computer with a mind full of ideas, anticipation and excitement... much like the feeling of being on the edge of the pool, deciding if I should jump in or sit back and do a little more watching. Today is the day I have finally decided to put my water wings on like a big girl and jump into the deep-end of the blogging pool.  I am intrigued by this world of collaboration, and watch in awe, as other educators put their ideas out there to share with the rest of us. I never thought of myself as someone who should make a blog. What could I have to contribute to these other educators who are worlds beyond me in education technology adventures? The answer to that question started a couple of years ago when my colleague and I decided to apply to have a class set of iPads introduced into our classrooms. Our school (www.norfolkacademy.org)  believed in our vision and we started this current school year with iPads in our Biology classrooms. E-texts replaced hardbound textbooks, and iPads replaced the daily puzzle of having to find a computer lab to access our texts. I hoped that this transition would be smooth, but was realistic to know it would be challenging. To help me navigate more effectively, I was again, given an amazing professional opportunity to attend the Ed Tech Teacher iPad Summit in November.  To say this was life changing is an understatement. I quickly learned three main lessons: 1. iPads are for creating, not just consuming. 2. iPads do not replace me as a teacher. 3. Failure is expected.  So here I am three months later, after being encouraged by some amazing educators I met at the ETT iPad Summit (www.edtechteacher.org), starting a blog. Before I go any further, I owe special thanks to Beth Holland, Shawn McCusker, Autumn Laidler and Jennie Magiera for being my "swim coaches" in this blogging pool! Check out their amazing work by following them on Twitter!

     The major lesson I learned as I have been on this iPad adventure is that I have so much to learn.  I am a teacher, mom, wife, friend, coach.  I wear many hats, as we all do. In every facet of my life, I am constantly learning how to be better, more effective, more efficient... more understanding. I am not one to sit idle. I have realized that I will always have a thirst for knowing more. To know more, I need to ask questions and share answers. Thus finding the answer to the question of what I have to offer to the world of blogging. So, as I jump into this pool of discovery, I invite you to join me and understand why I will always be "The Forever Student."

To learn more ways in which I am using technology in my classroom, follow me on Twitter. @eglassman757